
In this article, I will show you how to add a timestamp to the Canon HF R600, R700 and R800 video cameras. This tip came from a reader of the site after asking me what programs I used to add a timestamp to my video.
Terence was frustrated with how he was adding a timestamp to his video. Here was a bit of our email conversation:
Terence: I’m a PI in Houston and I was just wondering if this is still a good email address to contact you at? I’ve got a couple of questions about my camera which is, funny enough, the exact same Canon that you recommended in one of your videos.
I’m actually in the field right now so time is sort of the essence. If you could help me I really would appreciate it.
Andrew: Sure, what’s up?
Terence: Real simple but maybe I’m making it complicated. Time and date stamp. It’s driving me nuts…
I’m sure you’re busy, so long story short, what do you use (software-wise) to transfer your files from your camera to your PC while maintaining a burned in time and date stamp? I found the setting within the camera to display the time and date stamp and I can actually even get it to burn into the file but I’m having to go navigate those menus within the camera each time I wish to click record and have time and date stamp burned into the file. I use the camera on one case and I’m having to retroactively add time and date stamps to that but the way this Canon is setup, we will miss the first three to four seconds of whatever activity we are trying to capture because of this menu garbage. Am I doing something wrong?
Andrew: I don’t use that function in the camera. I would miss mass amounts of activity if I did that every time.
I use dvmp pro. The link to it is on my resource page. It burns the date and time into the video. Then I use movie maker and now Camtasia to put the clips together.
The process doesn’t take that long.
Terence: Ok, I’ll check it out. Thanks
Contents
- 1 How to Add a Timestamp to the Canon HF R600, R700, and R800 Video Cameras
- 2 Step #1
- 3 Step #2
- 4 Step #3
- 5 Step #4
- 6 Step #5
- 7
- 8 Step #6
- 9 Drag the date and time stamps to the location where you would like the stamps to be located when you begin videotaping.
- 10 Step #7
- 11 Step #8
- 12 Step #9
- 13 Why I Would Avoid This Process to Add a Timestamp to the Canon HF R600, R700 and R800 Video Cameras.
How to Add a Timestamp to the Canon HF R600, R700, and R800 Video Cameras
I then asked Terence to show me what he was doing to get the timestamp on his video. I had heard about adding a timestamp using a Canon camera but I had never taken the time to investigate it because I had heard it took several steps to make happen. Terence was kind enough to provide an example for me and walk me through the steps.
Here are the steps and pictures to help you through the process. You can also watch the video I created on adding a timestamp to your Canon video camera as well.
Step #1
Turn on your Canon video camera and wait for the screen to boot up. It should look something like this.

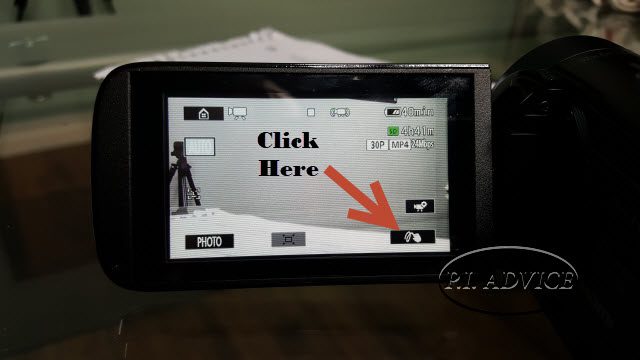
Step #2
Click the button in the bottom right-hand corner. This is the decoration button and will look like a hand using a finger to draw squiggly lines.
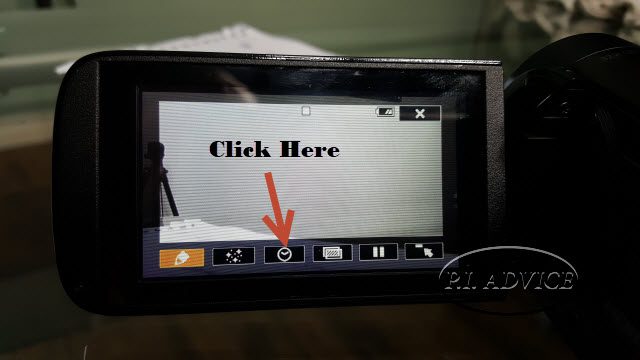
Step #3
Click the [Date/Time] menu option that looks like a clock.
Step #4
From this menu, you will see two options (Date and Time). Click both options until they are added to the screen.

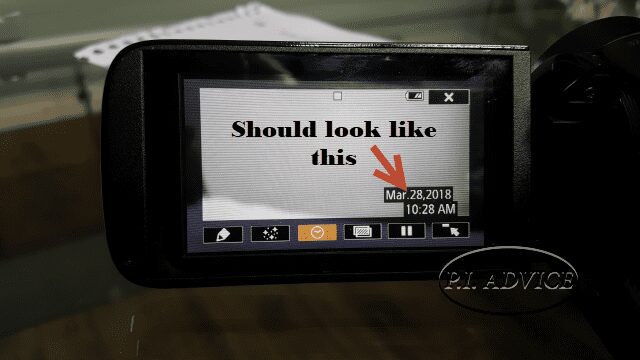
Step #5
Click the “Ok” button in the top left corner after you have pressed both options (date and time). Once you do this you will be left with the date and time in the center of the screen.

Step #6
Drag the date and time stamps to the location where you would like the stamps to be located when you begin videotaping.

Step #7
Once you have done this (while remaining in this mode) begin recording video.

Step #8
Once you have finished recording you can remain in this menu option until you need to videotape again.
It is recommended that if you decide to leave your camera on in this mode that you plug into a charging device.
Step #9
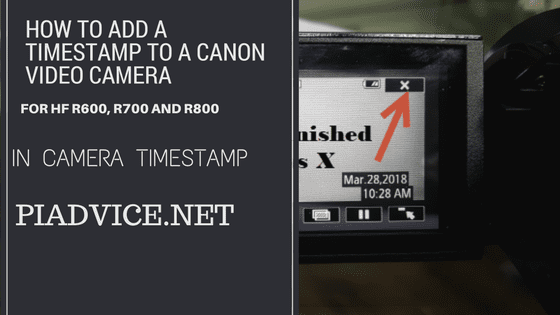
If you decide to exit out of the mode, click the X in the top right corner and it will bring you back to the main menu.

Why I Would Avoid This Process to Add a Timestamp to the Canon HF R600, R700 and R800 Video Cameras.
As you may have read in my conversation with Terence it was incredibly frustrating for him to have to repeat this process over and over again through a surveillance day. It is time-consuming and just not practical for a surveillance especially if the person is incredibly active.
Another thing that would bother me and be concerning, is trying to match the date and time stamp to the same location on the video each time I wanted to videotape. That process alone would add several seconds. Then I would worry if the video footage would be questioned when showing the video in court if the date and time stamps were not in the same location for each video clip.
This is also why I recommend purchasing a video camera that doesn’t take a long time to start up because you don’t want to miss anything if you don’t have to.
So while this process is definitely an option I would recommend processing the video after the surveillance is over so you can focus on the reason you are conducting surveillance. To document the activities of what or who you are watching.
I hope you found this helpful.
Andrew
Recent Posts
Hawaii is probably one of the most interesting states to work as a private investigator if you are not used to the culture or a native of the state. And if you are not a local, that is something...
How to become a private investigator in Georgia