
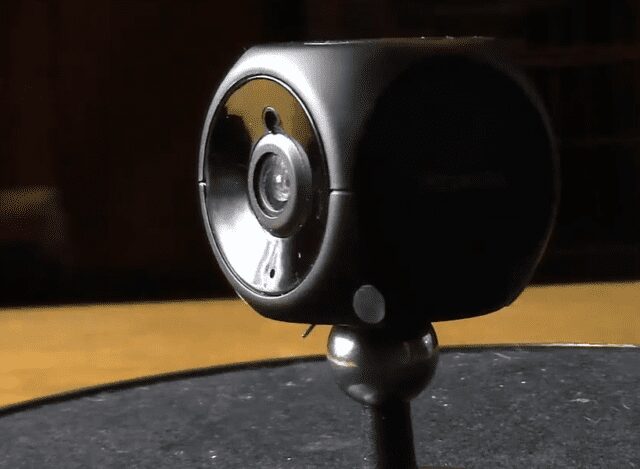
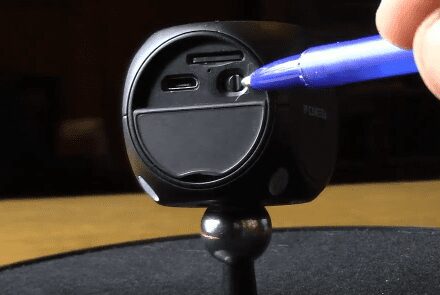
Security cameras come in all different shapes and sizes and can have a variety of capabilities. This camera arrived in a small box and looked quite appealing. The camera is square shaped with rounded edges a control button on the top, micro SD card slot in the back, mini USB port in the back and on/off switch in the back. All of which can be covered. There is a link below to this camera.
CamRom, the makers of the CamRom 720P Smallest WIFI-IP Security Camera asked that I review their camera and of course I happy to do so. Truthfully I didn’t know what to expect from the camera and didn’t know what it would be capable of until I got my hands on it.
Contents
- 1 What is in the Box
- 2 Camera Specs According to the Company
- 3 Getting Started With This Camera
- 4 AIC
- 5 QR Scanner for Android
- 6 Recording From the Device
- 7 Video Settings While Monitoring
- 8 HD Setting
- 9 Standard Video Setting
- 10 Smooth Setting
- 11 Monitoring the Video
- 12 Video at Night Indoors
- 13 Video at Night Outdoors
- 14 Light Indoors
- 15 Daylight Outdoor Video
- 16 Audio
- 17 How you Monitor the Video
- 18 Who is This Camera For?
What is in the Box
- Camera
- USB charging cable
- Wall charger
- Camera ball mount
Camera Specs According to the Company
- Camera- 1.3 megapixel CMOS
- Resolution- 1280*720p
- Video format- MP4
- Frames- 15
- View angle- 120
- Battery capability- 320mAh
- Compressed format- H.264
- Power consumption- 280mA/3.7V
- Storage temperature -20-80¡æ
- Infrared Light- 12 units IR LEDs, Night visibility up to 8 meters
- Operating temperature -10-60¡æ
- Operating humidity 15-85%RH
- Type of memory card- Micro SD card
- Maximum capacity of memory card- 32GB
- Looping recording-yes
- Mobile phone operation system-Android/iOS
Getting Started With This Camera
The first couple of things you will need to do to get this camera working is to have a micro SD card, have a QR Code Scanning App to download the AIC App in Google Play or Itunes Apps. I downloaded the QR Scanner for Android (By Honesty App). Below are what the apps look like for Android. Download them both.
AIC

QR Scanner for Android

After you have downloaded both you will need to scan the QR code in the back of the camera and copy the code once it comes up on your phone. The code is so small that I couldn’t read it clearly.
You can have your camera on at this point with the memory card inserted.
Once you copy the number (which will come up after you scan the code) you will need to place that code in the AIC app when it asks for the UID. You will also need to enter the password on the back which the app will ask you to change it to a password that you want.
To connect to the camera directly from your phone you will need to open WiFi connections on your phone and find the one that IPCAMAP_***** <— numbers and letters). Basically the camera puts out a signal that you connect to which allows you to use your phone as a monitor. This has limited range.
You can also connect to the camera through your router which can be done through the app. When you do this it will give you more range between your phone and camera so you won’t have to be so close to it.
The directions that were provided basically get you to the point where you can monitor the video feed.
Recording From the Device
This device does record at approximately 6 to 15 frames a minute. Viewing the video that is recorded on the app appears to be inconsistent. Sometimes I was able to review recorded video on the app and sometime I was not able to. If this is something you figure out when using this please let me know and I will try it myself and then update this post.
Much of the video I reviewed was from the memory card itself. I was able to record some of the video on the app itself. The video wasn’t the greatest quality. It did record sound very well even through the recordings were:
- 15 to 20 feet connected from camera to phone
- 80 to 100 feet approximately depending router footprint
Video Settings While Monitoring
There are three different video setting you can choose from while monitoring the video.
- HD
- Standard
- Smooth
HD Setting
The HD setting makes the video more sharp and focused but it slows down the frame of video.
Standard Video Setting
This setting makes the video a bit less sharper than the HD setting but speeds up the frame rate a bit.
Smooth Setting
In this setting the video is much more fluid but loses the sharpness that the HD setting would provide.
Monitoring the Video
The video view while monitoring the video is pretty good. To get a first hand view be sure to see the review video.
[youtube_sc url=”https://youtu.be/F6X3QyHSoBM”]
Video at Night Indoors
This camera does have infrared lights on it which provides some light on your video. I tested this in my studio area and I was able to make out different things within the room. I stood approximately 15 feet from the camera and could make out that I was standing in the room. The further things are from the camera at night the harder it is to make out images. This is typical with most video that uses infrared lighting in my experience.


Video at Night Outdoors
The video at night is average and that is to be expected. You aren’t able to put the camera up to a window to videotape outside because the infrared light interferes and creates a glare that doesn’t allow you to see through the window. This camera would have to be posted outside to get any clear video at night.
Light Indoors
The quality indoors with the lights on is pretty good. I did most of my testing indoors connecting to the camera from WiFi. There is only a slight delay in movements which I tested with my son. He raised his arm when I asked him and the video only had a momentary delay.

Daylight Outdoor Video
I propped the camera up against my office window during a cloudy day and found that the video quality is decent for this type of camera. I don’t think anyone would be disappointed with the quality.
Audio
The audio can be monitored as well during recording and it picks up sound very well.
How you Monitor the Video
All the video from this camera is monitored from the app on your mobile or tablet device.
The camera can connect to your phone/tablet directly or through a wifi connect (through your router).
Connecting directly to Your Phone or Tablet has a very limited range. My testing showed the range between my phone and the camera to be approximately 15 to 20 feet.
Connecting to WiFi extends the range a great deal. Essentially the range with WiFi will be whatever footprint your WiFi has. I tested approximately 50 feet between my phone and camera on WiFi.
Who is This Camera For?
Though this camera does record I was not as interested in that part of the camera, though I am sure you will be. I would use this as a monitoring camera. A camera that I can put in the front window of my home and monitor anything around it without having to be in looking out the front window.
I could see using this in my surveillance vehicle to monitor my blind spots (I will post a video of this in the future).
This is a very inexpensive security camera that can only be monitored if in range (direct range or WiFi range). It can be a starter surveillance camera or an addition to an existing surveillance camera network.
I will be using this camera with an old phone as a monitor. And since it is such a small camera I can take it with me because it is portable and can be connected directly to my phone.
How will you use this camera? Be sure to comment in this post if you decide to purchase one.
I hope have more reviews of spy cameras and cameras related to home security in the future. Be on the look out for that.

Below is an Amazon Affiliate Link to this camera and other cameras you may be interested in.
Recent Posts
Hawaii is probably one of the most interesting states to work as a private investigator if you are not used to the culture or a native of the state. And if you are not a local, that is something...
How to become a private investigator in Georgia