
In this article I share how to remove audio from your video using Microsoft Movie Maker. Before I share the tutorial I thought it might be helpful to explain why you would need to remove audio from your video.
Contents
- 1 Back in the day when we wanted to remove audio from your video
- 2 How to Remove Audio from Your Video Using Microsoft Movie Maker
- 3 #1. Open up Movie Maker
- 4 #2, Place the Video/Videos in Movie Maker
- 5 #3. Assign all the Videos in Movie Maker You Want to Remove or Silent the Sound
- 6 #4. Remove the Sound
- 7 #5. Save the Video
- 8 Recommendation
- 9 ALTERNATE WAY TO DO THIS PROCESS
- 10 Conclusion
Back in the day when we wanted to remove audio from your video
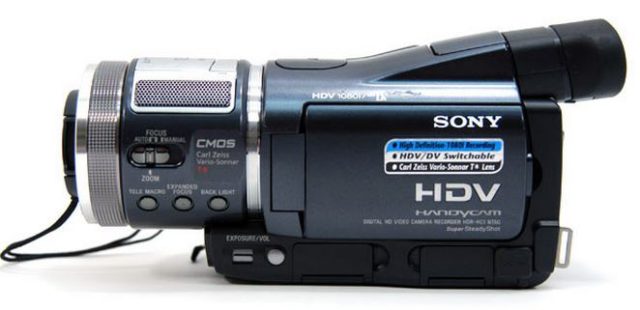
For many reasons private investigators do not want audio to be present in their video. When I first began working surveillance as a private investigator I was handed a very large Sony Camera. The closest model number and appearance I could find with a brief internet search was the Sony HDR-HC1 which was made around 2005. The camera had everything (night vision, a variety of viewing options, huge batteries, long zooms) and used cassettes which were a bit bigger than the mini DV cassette. One thing in particular that it had was an audio port which could be disabled by sticking in a 3.5mm or 1/8” microphone connector. As long as the port was being used by something that didn’t record then no audio would be recorded.
As technology increased and the video cameras got smaller they did away with the audio jack. Investigation companies would send in the newer video cameras to the makers and ask that they disable the audio recording function. Some makers would do it.
More time passed and video camera makers would no longer disable the audio for investigation agencies. Many of the agencies removed the audio to the videos during the time they transitioned video from the cassette to the VCR tape (now DVD).
I still remember everyone being very paranoid about any noise that was made while videotaping a subject. There couldn’t be any rude comments about the person that was being videotaped (to be clear I never did that but heard embarrassing stories of those who did), there was no more passing gas while videotaping and investigators would be careful not to talk on the phone while working.
Laws are different throughout the United States in regards to there being one or two party consent when it comes to recording audio (in case you happen to record the individual’s conversation).
To eliminate the issue of audio when recording video I remove all audio from my video recordings when I compile my video. There are then no issues with possibly recording a conversation or any noise from your surroundings being in the video.
Even though I remove all the audio from my videos I am sure to keep the original videos with audio in case someone needs the raw footage. Currently, there are no video cameras that record with a time stamp embedded in the video so the time stamp is typically embedded in post-production of the video which takes away from the footage being raw and technically original.
I would recommend having all the versions of the video stored in a safe place.
How to Remove Audio from Your Video Using Microsoft Movie Maker
#1. Open up Movie Maker
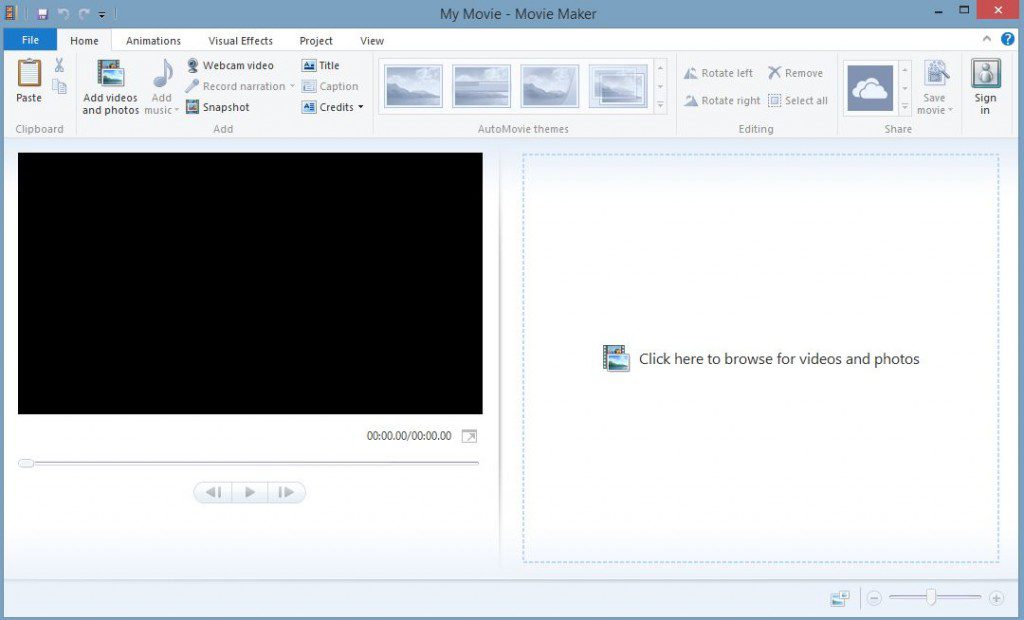
The first thing you need to do is to open the Movie Maker video editing application on your computer. There are many different versions of Movie Maker out there which depends on what version of windows you are running. Generally speaking, you should be able to follow along with whatever version of Windows you are using with these instructions. I am using Windows 8 currently.
#2, Place the Video/Videos in Movie Maker
You can either drag the video into the box on right side or click on “Click here to browse for videos and photos.” If you click to browse for photos then you will need to arrange them in the proper order on the video timeline if you have more than one video.
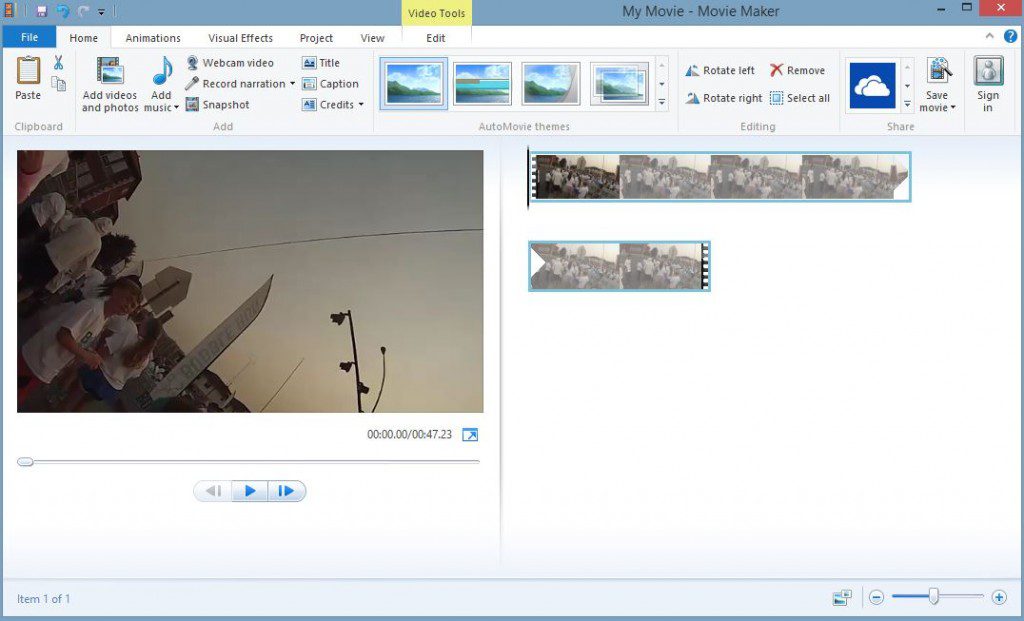
If you are dragging more than one video into the box arrange them in the order they were taken.
NOTE: If you place a group of videos into the box they will likely not be in the order they were taken or that you want them to be in. Be sure to check that they are in the way you want.
#3. Assign all the Videos in Movie Maker You Want to Remove or Silent the Sound

If you are only placing one video within movie maker you don’t need to worry about these instructions.
If you are placing more than one video file in Movie Maker you will need to highlight each video that you wish to remove the sound from.
To do this you need to press and hold the CTRL on your keyboard and use your mouse to highlight all the videos. In the Windows 8 version, you should see a blue line around the video once it has been highlighted.
Once all the videos have been highlighted, move onto the next step.
#4. Remove the Sound
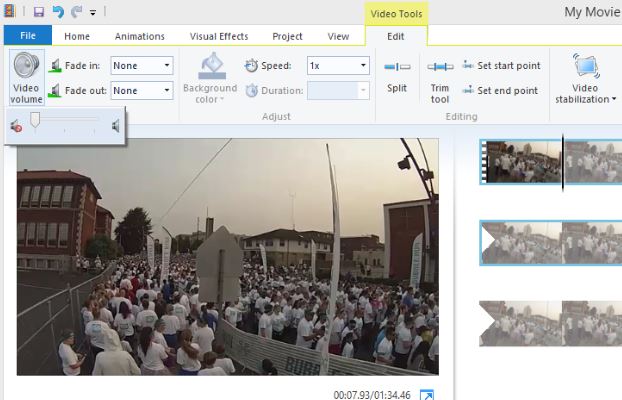
To remove the sound from all the selected files you will need to select EDIT from the top menu.
After clicking edit you will see a “Video Volume” on the very left side of the menu with a speaker next to it.
Click the speaker and move the dial to the left where the speaker is crossed off (no sound).
#5. Save the Video
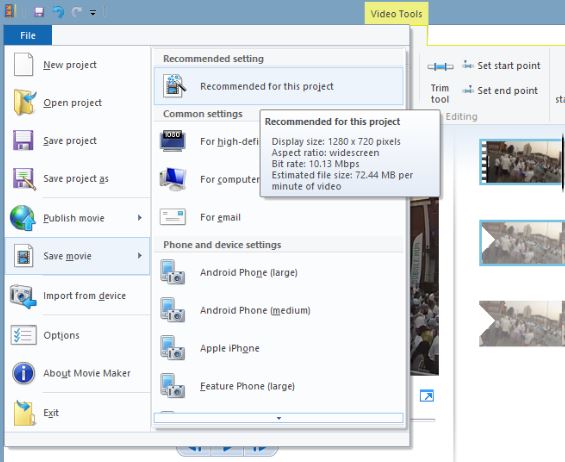
To save the video you will click on “File” on the top menu.
You will then select “Save Movie”
You will then select “Recommended for this project”
It will ask you to title the file and determine where you want the video file to be saved on your computer. I typically just save it to my desktop so I can quickly find it and then file it where I want.
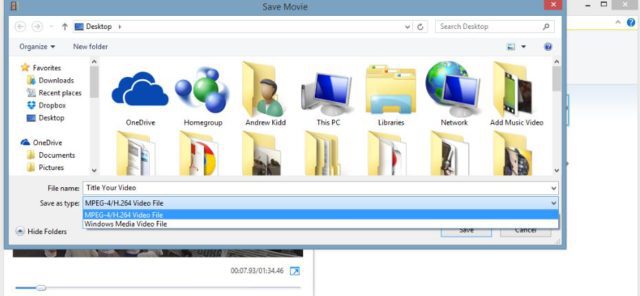
You also have the choice to create the movie in MPEG-4 or a Windows Media File.
After you have made your selections click the “Save” button and it will begin saving your video without audio to the location you have selected.
Recommendation
I recommend watching the video to make sure all the audio is removed to make sure you didn’t miss a video clip when selecting more than one.
ALTERNATE WAY TO DO THIS PROCESS
A second way to do this process is placing all your video that you want to be compiled together (if you have more than one) into movie maker and save the video as explained above. After the video is saved, place the save video back into Movie Maker and repeat the process of removing audio again.
Sometimes I do it this way if I have a lot of video being compiled together and I don’t want to worry about missing a clip during the selecting process.
Conclusion
This is the process I have been using for a long time to remove audio from spy camera video. Movie Maker is a basic video editing software but it gets the job done when wanting to remove audio. Let me know in the comments if this was helpful for you.
Recent Posts
Hawaii is probably one of the most interesting states to work as a private investigator if you are not used to the culture or a native of the state. And if you are not a local, that is something...
How to become a private investigator in Georgia